How I created my first blog using Jekyll and Github Pages
Jekyll is a static site generator and github pages are used to host the site build using jekyll. If you are comfortable with reading and understanding code, you can easily built a site using these tools. I customized the minima theme to suit my needs and for this I had to read about jekyll, liquid template, html, css and markdown. But I am amazed that with some efforts we can easily have a professional looking website. After looking at the result, I think it is well worth the efforts.
In this blog, I outline the installation steps and how you can customize your blog.
Important: These installation steps are for Ubuntu 16.04. But I have included the links for other versions of Ubuntu.
Installing ruby using rbenv
Steps to install ruby can be found at gorails website. I have copied the steps from there.
cd
git clone https://github.com/rbenv/rbenv.git ~/.rbenv
echo 'export PATH="$HOME/.rbenv/bin:$PATH"' >> ~/.bashrc
echo 'eval "$(rbenv init -)"' >> ~/.bashrc
exec $SHELL

git clone https://github.com/rbenv/ruby-build.git ~/.rbenv/plugins/ruby-build
echo 'export PATH="$HOME/.rbenv/plugins/ruby-build/bin:$PATH"' >> ~/.bashrc
exec $SHELL

rbenv install 2.7.1
rbenv global 2.7.1
ruby -v
The last step is to install Bundler
gem install bundlerRun rbenv rehash after installing bundler.
Installing Jekyll
To install jekyll:
gem install jekyllCreate a new Jekyll site at ./myblog.
jekyll new myblogYou can refer to docs to create jekyll site on Jekyll website.
Website folder will contain some or all of these folders :
- _posts
- _layouts
- _site …etc.
You can learn about there function from jekyll docs.
_posts : It contains all the posts. The name of posts should be of the format YYYY-MM-DD-<post-name>.md. eg : 2020-08-13-how-i-created-my-blog.md
Each post contains a front matter which contains title, author, layout or any variable you want to include.
---
layout: post
title: My first blog
---
Customizing Theme
To locate the theme’s files on your computer run
bundle info --path <theme-name><theme-name> is the name of the theme. eg : bundle info --path minima for minima theme.
Copy the theme files in the website folder to customize them.
Learn more about customizing themes from jekyll theme docs.
Using Disqus comments
You can signup on disqus and add your site there. Minima has a inbuilt support for disqus comments.
What is disqus shortname?
If your disqus url is your-shortname.disqus.com, then “your-shortname” is your disqus shortname.
You have to add your disqus shortname in config.yaml.
disqus:
  shortname: <disqus-shortname>
Using Google Analytics
Minima has support for google analytics too.
You can signup on google analytics and add your tracking id in config.yaml.
google_analytics: XX-XXXXXXXXX-XAdding share buttons on each post
You can add share buttons to every post by following the directions given here.
jekyllcodex has some plugin free solutions for jekyll blogs.
Changing layout of the blog
_layouts folder contains the files related to different layouts. _includes folder contains header.html, footer.html etc. They contains html code which can be changed as required or you can add file containing customized layout. This file has to be added to the front matter in your post.
eg. I created note.html file to have a different layout than the post. So to get note layout for a particular post, its front matter will contain:
---
layout: note
---
Deploying the site using github pages
Github has excellent documentation on creating a GitHub Pages site with Jekyll.
Troublshooting tips
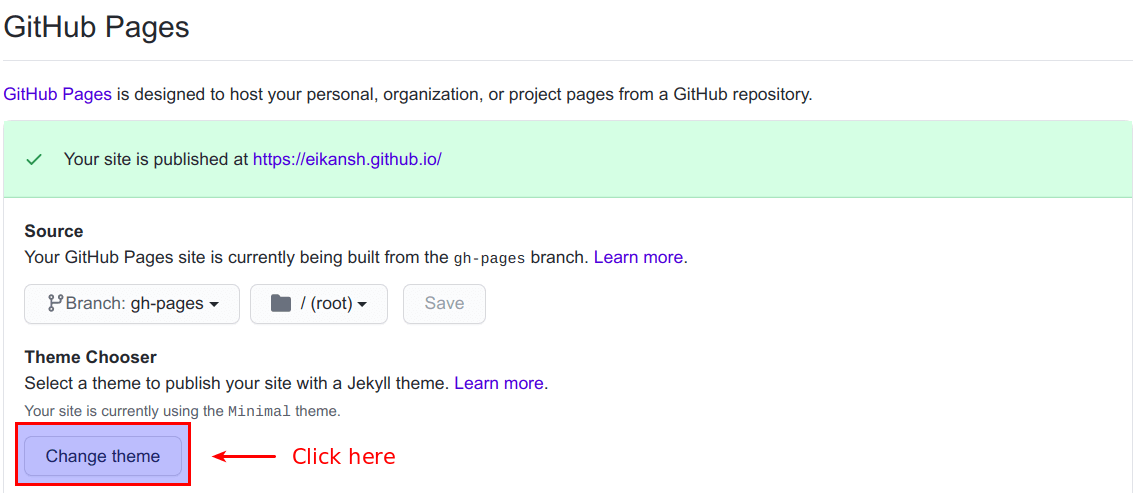
- Even after following all instructions from github documentation, site may not be published. There seems to be a bug. The workaround is to choose a theme(even if you don’t want to) from repository settings as shown in image below.
- If you have enabled disqus comments and they are still not showing, add
https://tourldefined in config.yaml.
You can fork this blog’s repository here.